
Plan a DIY solar kit around the job it must do, then check whether the equipment, site and installation plan can support that job. Start with a load record, identify the system type, and document the component interfaces before ordering. Buying panels, a battery and an inverter is not the same as having a finished design.
This guide is for planning a separate-component, battery-based off-grid system for defined loads. Here, DIY means organizing a project built from manufactured equipment—not making solar cells or improvising a connection to your home’s electrical panel. The outcome is a brief you can review with a qualified designer or installer, not instructions to energize the system.
Choose the project before choosing the equipment
“Solar kit” can describe quite different purchases. Decide which of these you mean:
- A movable supply for individual appliances
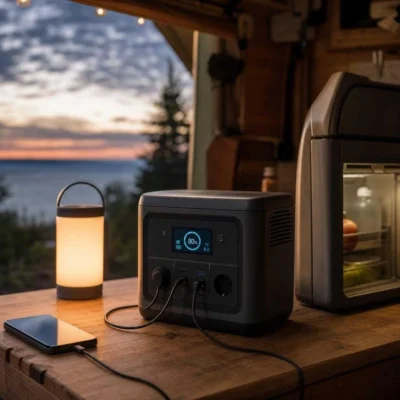
- A portable power station with compatible panels may avoid the need to assemble separate charging, storage and inverter components. Start with what a solar generator includes if this is the job.
- A separate-component off-grid battery system
- You are planning the relationship between the array, charging equipment, storage and loads. This guide follows that route. Some functions may share an enclosure; a separate box is not required for every function.
- A system connected to building circuits or the utility
- Mark this explicitly in the brief. Building connections, backup transfer arrangements and utility export are design decisions, not optional accessories added after buying the kit. Off-grid operation and permission to export electricity are different things.
Write the intended boundary in one sentence: for example, “supply these workshop loads independently of the utility.” List what is excluded. If the plan changes to supplying existing building circuits, have the design and applicable approvals reassessed rather than assuming the original shopping list still works.
Describe a real day of use
A panel’s watts describe a power rating; an appliance’s watt-hours describe energy used over time. You need both the energy budget and the load’s power requirements. A large battery cannot compensate for an inverter that cannot start or run the intended equipment.
For a hypothetical steady load, a 40W fan used for six hours consumes 240Wh before system losses. That arithmetic says nothing about another appliance’s startup demand or whether the system can replace the energy tomorrow. For refrigerators, pumps and other cycling loads, use representative measured consumption or documented operating data rather than assuming the nameplate watts apply all day.
- Record the use: named appliances, required voltage, daily energy, likely simultaneous operation and any startup requirements.
- Record the setting: location, occupied months, daily schedule and whether loads continue when nobody is present.
- Define interruptions: how long essential loads must run without dependable recharging, what can be switched off and what fallback supply is available.
- Label uncertainty: distinguish measurements from estimates and identify which unknowns need resolving before equipment selection.
Then use the battery-bank sizing guide to work through usable storage, losses and reserve. Keep the load record with the calculation: changing the operating schedule can change the required system even when the appliance list stays the same.
Give every component a job
Build a functional parts list before choosing brands. Include the equipment needed to install and operate the system, not just the large items shown in the listing photo. The Department of Energy identifies mounting structures, wiring, disconnects, fuses and combiner boxes as balance-of-system hardware; the actual selection depends on the installation.
| Function | Equipment or provision | What to record |
|---|---|---|
| Generate electricity | Solar modules and proposed array layout | Exact modules, quantity, available space and electrical specifications. |
| Manage charging | Charge controller or integrated charging function | Supported array and battery limits, settings and any other charging sources. |
| Store energy | Battery bank and its required management/protection | Usable-energy assumptions, current limits, permitted configurations and environment. |
| Supply the loads | Inverter for AC loads; appropriate distribution or conversion for DC loads | Voltage, frequency where applicable, continuous demand and startup requirements. A DC-only load does not automatically require an AC inverter. |
| Support and connect equipment | Mounting, enclosures, conductors and connectors | Site arrangement, cable routes, equipment instructions and responsibility for the mechanical/electrical design. |
| Protect, isolate and supervise | Design-specific protection, disconnects, distribution and monitoring | Who selects these provisions, how normal operation is observed and who handles faults. |
Add an “included, excluded or unresolved” note beside each item in your own list. An integrated inverter/charger may cover more than one function, but it does not make unspecified mounting, protection or wiring disappear. Ask the responsible designer to check the complete arrangement rather than treating every row as an instruction to buy another box.
Check what happens between the boxes
Matching headline watts is not a compatibility check. For each interface, retain the exact equipment manual and the design decision it supports. A useful record identifies the proposed configuration, its applicable limits and the person responsible for checking it.
Array to charging equipment
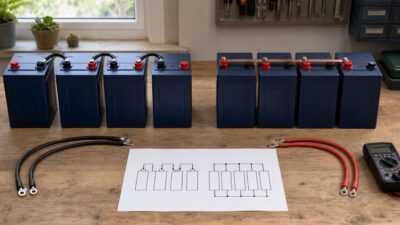
The panel layout has to fit the charger’s permitted input conditions. The charge-controller sizing guide explains the separate voltage, current and battery-side checks. Use the series-versus-parallel guide when evaluating a proposed array—not as permission to rearrange an installed one.
Charging equipment, battery and inverter
Require documented compatibility for the battery voltage, charging settings, permitted battery arrangement and charge/discharge capability. If several charging sources are planned, include them in the same review. Storage energy alone does not establish that a battery can support the inverter’s current demand.
The equipment instructions matter at installation too. For example, Victron’s SmartSolar MPPT 75/10 through 100/20 documentation specifies mounting, protection and connection-order requirements for that controller family. This is why a generic “connect the panels, then the battery” recipe is inappropriate. Use the exact model’s approved procedure and the site-specific design.
Connections and loads
Record connector identity, not just whether two parts appear to fit. Stäubli warns that cross-mating PV connector brands can compromise the connection. A seller’s “MC4 compatible” description is not a substitute for checking the permitted mating components.
At the load end, confirm the actual supply required. A 120V appliance and a 240V appliance do not become interchangeable because the inverter has a large wattage rating. Have the designer resolve distribution, protection and any building connection; this checklist does not specify conductor sizes, fuse values or grounding and bonding arrangements.
Find the site constraints while changes are inexpensive
Before ordering, make a simple site sketch showing the proposed panel area, equipment location, access and cable routes. Record shade during the season you intend to use the system, rather than relying on one sunny visit. Ask who will assess mounting feasibility and any structural work.
Check the proposed equipment environment against its manuals: temperature, moisture exposure, ventilation and service access can affect where it may be installed. A convenient empty cupboard is not evidence that a battery or inverter belongs there.
Ask for a production estimate that states its weather and installation assumptions. The PVWatts API is described as estimating grid-connected PV energy production. A production estimate is not, by itself, proof that an off-grid system will maintain its loads through consecutive poor-weather days. Your plan also needs to address stored energy, ongoing demand, recovery and fallback supply.
Identify the local permitting authority early. The Department of Energy’s rooftop solar permitting guidance describes local variation and the inspection and utility-connection process. It does not establish an exemption for a stand-alone project. Ask what applies to your actual mounting, storage and electrical arrangement; do not assume “off-grid” or “DIY” answers that question.
Put a price beside the unfinished work
Keep two figures: the equipment price and the estimated cost of a usable, commissioned installation. Beside each exclusion, record either a quote, an explicit estimate or “not yet priced.” An unknown is not zero.
| Budget line | Question to settle |
|---|---|
| Equipment and delivery | Which exact configuration and quantities does the price cover, and are delivery charges included? |
| Mounting and site work | What supports, attachments, weatherproofing or preparation remain outside the package? |
| Electrical installation | Who prices the specified cables, protection, enclosures, distribution and labor? |
| Design and approvals | Who pays for the required design work, applications, inspections and commissioning? |
| Ownership and service | What monitoring, scheduled maintenance, service access and replacement responsibilities should the budget allow for? |
Do not count on labor savings until you know which work you can lawfully and competently undertake and which work the installer will accept responsibility for. Compare incentives only after checking current eligibility for the actual project; this guide assumes no rebate or tax credit.
Once the scope is clear, use the complete off-grid kit buying checklist to compare packages and supplier exclusions. A cheaper bundle is not a cheaper finished project when the missing work differs.
Arrange the handover before the delivery
Decide who is responsible for the stages below before equipment arrives. That avoids a project where the supplier supports individual products but nobody has agreed to support the assembled system.
- Delivery check: compare model numbers and quantities with the agreed parts list, retain the manuals and resolve damaged or substituted items before installation.
- Installation and commissioning: agree who follows the approved design, records the installed configuration and settings, and completes applicable inspection and commissioning requirements.
- Operating handover: obtain the system’s operating instructions, normal monitoring information, documented shutdown guidance and a service contact.
- Maintenance and changes: establish the manufacturer-required care schedule and a process for reviewing added loads, replacement batteries or array expansion.
The plan should say what to do when a fault or alarm occurs—not ask an inexperienced owner to improvise a repair. Record faults and follow the documented safety and service instructions. Changes to the equipment or use pattern should be checked against the original design before assuming there is spare capacity.
Take a brief to design review—not an unverified shopping cart
You are ready for a useful design discussion when you can provide a dated load record, a proposed system type, a site sketch, a component list with supporting documents, unresolved cost items and named installation responsibilities.
Keep purchasing on hold if a critical interface has no documented answer, mounting feasibility is uncertain, approval requirements remain unknown or nobody has accepted responsibility for the finished installation. Resolve that specific gap rather than buying a larger battery or inverter as insurance.
The next step is to have the responsible designer or installer review the brief and identify the work needed to turn it into an approved design. Only then compare equipment against that design. A completed planning checklist is progress toward a build; it is not approval to connect or energize one.
Research note: This is a documentation-based planning guide, not a hands-on kit test or a site-specific electrical design. Sources were reviewed on October 28, 2026. Exact equipment instructions and applicable local requirements govern installation.

Leave a Reply